
If you’ve just got a blue steel pan and aren’t sure where to start, this guide covers everything you need to know about how to season a blue steel pan. Whether you’re seasoning for the first time or starting over, the process is the same. The process isn’t complicated, but doing it right from the beginning makes a real difference in how the pan performs — and how quickly it gets to that naturally nonstick surface you’re after.
Why Blue Steel Pan Seasoning Is Different
Before getting into the steps on how to season a blue steel pan, it’s worth understanding what makes it different from a standard carbon steel pan — because it changes how you approach the process.
A blue steel pan is heat-treated during production to form a protective blue-grey oxide layer on the steel surface before it ever reaches your kitchen. This process forms a dense iron oxide layer on the surface of the steel.
What this means in practice: a blue steel pan starts with a more stable, more protective base than standard carbon steel. As you cook with it and build up the seasoning, the surface tends to develop more evenly and is less prone to patchy discolouration. Patching can still happen — it’s a normal part of how carbon steel behaves — but the denser oxide layer gives you a more consistent foundation to work from.
Knowing how to season a blue steel pan correctly, tends to produce a more reliable result than seasoning a standard carbon steel pan from scratch.
What You Need Before You Start
Nothing complicated here:
- A neutral oil with a high smoke point — grapeseed, canola, or sunflower all work well. Avoid olive oil or butter for seasoning; their smoke points are too low.
- Paper towels or a lint-free cloth
- A gas stove (more on this below)
- Warm water and a sponge for the initial wash
How to Season a Blue Steel Pan — Step by Step
Step 1: Wash the pan
Before the first use, wash the pan with warm soapy water to remove any protective oil applied during manufacturing. Rinse thoroughly, then dry completely — either with a cloth or by placing it on low heat on the stovetop for a couple of minutes.
Make sure there’s no moisture left. A damp pan going into a seasoning session is a problem.
Step 2: Heat the pan
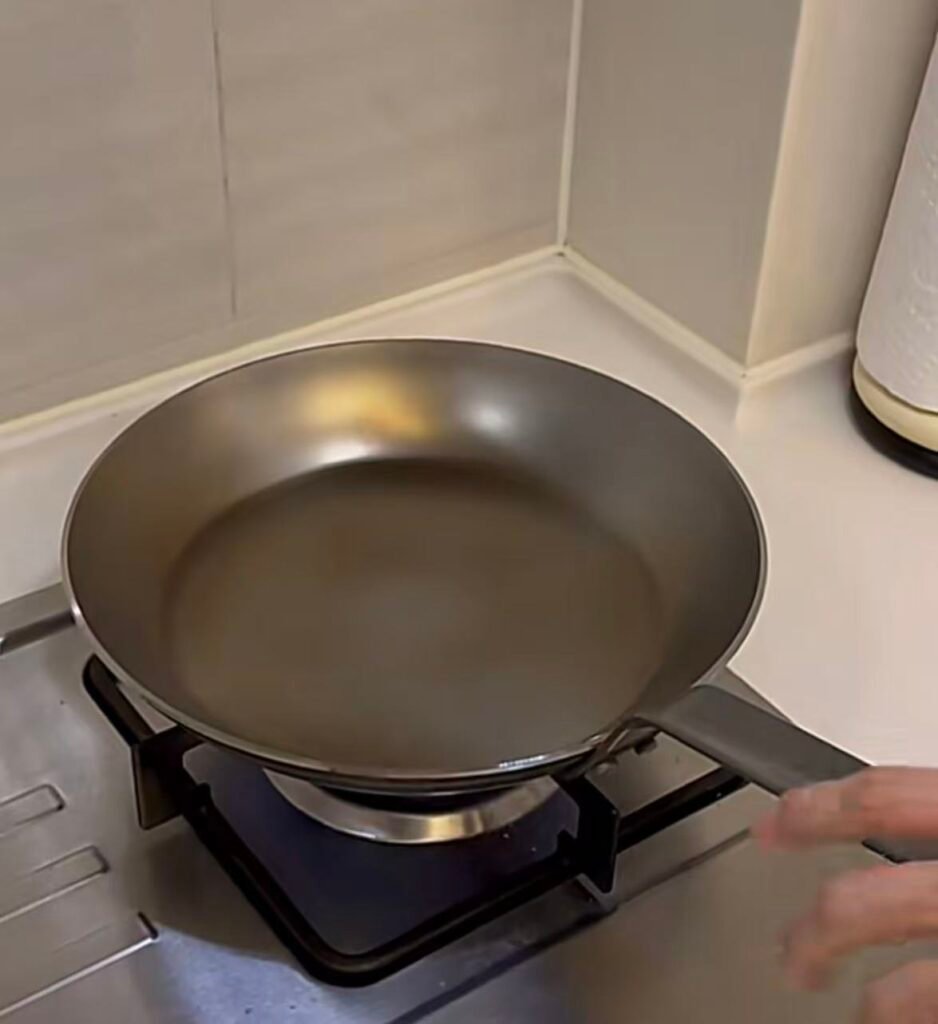
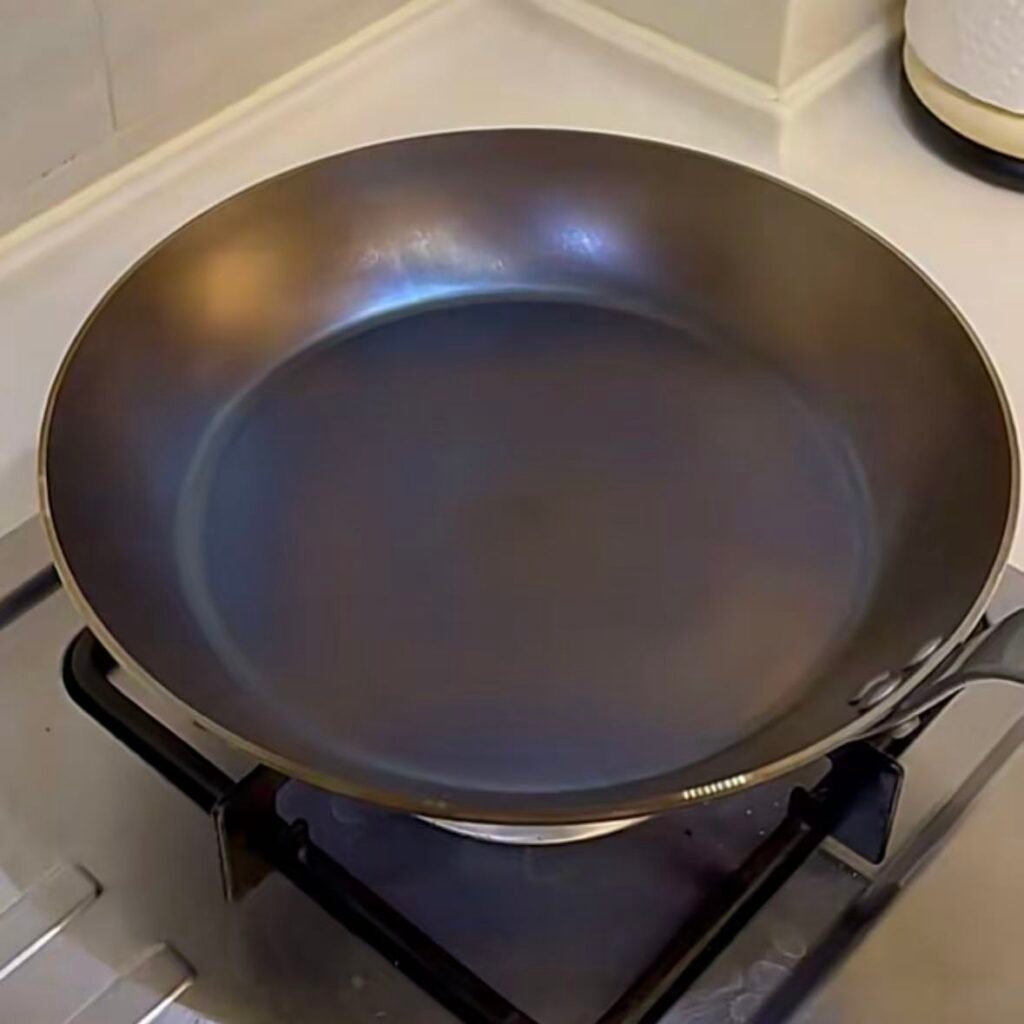
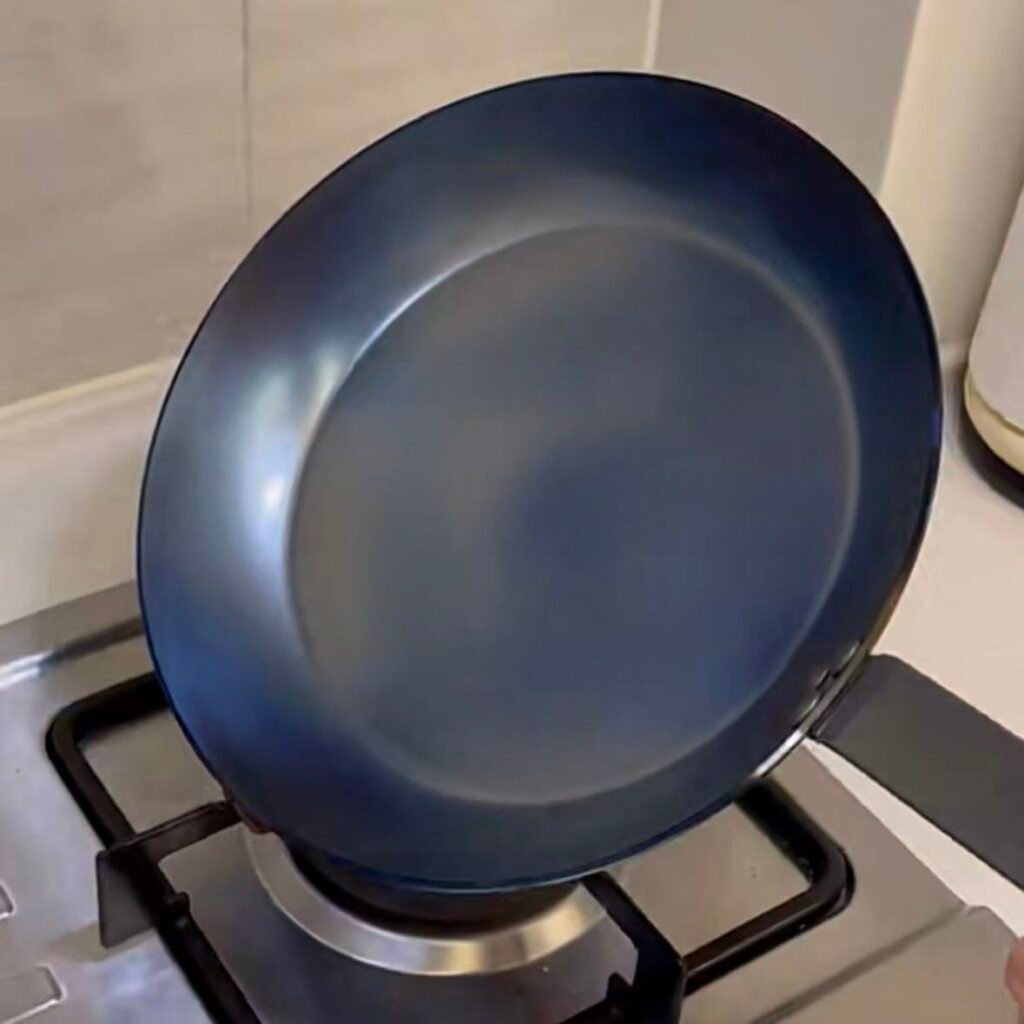
Place the pan on the stove over medium heat. For gas stoves, use a flame that’s just large enough to cover the base of the pan — no larger. A flame that extends up the sides wastes heat and can cause uneven temperature distribution.
Let the pan heat for a minute or two. To tell when it’s ready: watch the surface of the pan — as it heats up, the blue steel will visibly deepen in colour, turning a more pronounced blue across the entire base. Once the whole surface has shifted to that deeper blue and held for 1–2 minutes, the pan is evenly heated and ready for the next step.
Step 3: Apply a very thin layer of oil
Turn off the heat and leave the pan to cool for 5–10 minutes. The pan should still be warm to the touch — not hot. Applying oil to an overly hot pan causes it to spread unevenly and can lead to a sticky, blotchy result instead of a smooth layer.
Once the pan has cooled down sufficiently, add a small amount of oil — less than you think you need. Use a paper towel to spread it across the entire surface, including the sides, then wipe off the excess. The pan should look almost dry. If there’s a visible pool of oil, you’ve used too much.
This is the most common mistake in blue steel pan seasoning: too much oil. Excess oil doesn’t polymerize properly — it stays sticky and creates an uneven, blotchy surface instead of a smooth, nonstick one.
Step 4: Heat until the oil smokes
Increase the heat to medium-high and let the pan heat until the oil starts to smoke. Once it smokes, hold the temperature for another minute or two, then turn off the heat and let the pan cool completely.
Step 5: Repeat
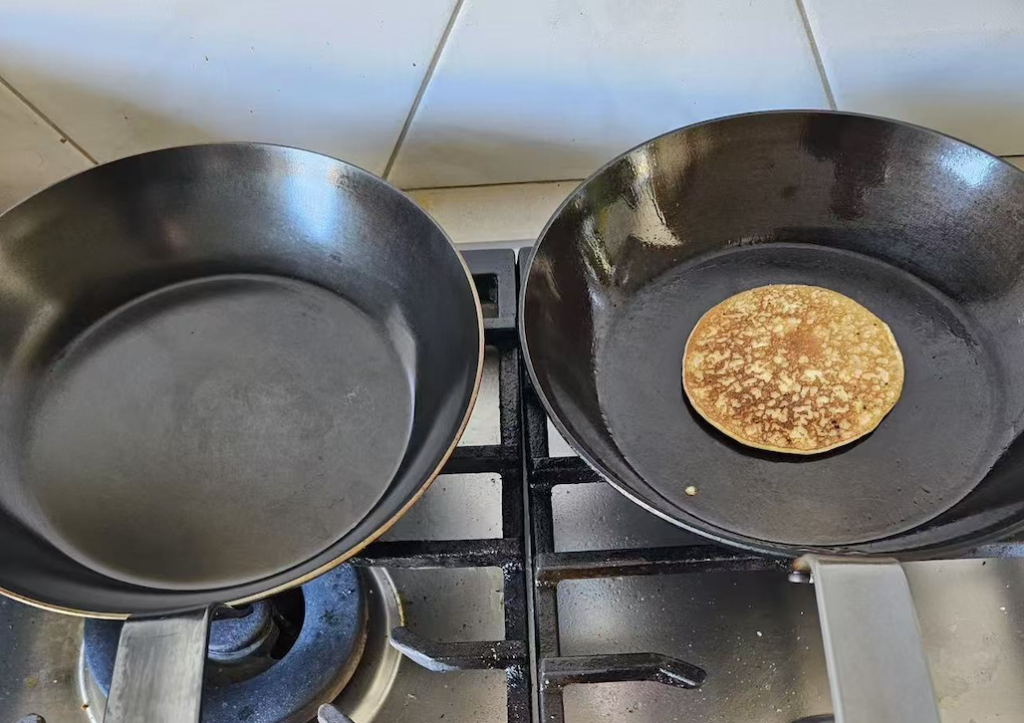
Repeat steps 3 and 4 two more times. Three rounds is the standard starting point when you learn how to season a carbon steel pan — enough to build an initial layer and get the pan ready for cooking. The surface should have darkened noticeably by the end of the third round.
Which Stovetop Works Best
Not all stovetops are equal when it comes to how to season a carbon steel pan — and the wrong choice can affect the result significantly.
Gas stove — the best option. The flame distributes heat more evenly across the pan surface, which produces a more consistent seasoning layer. If you have a gas stove, use it.
Induction and ceramic stovetops — not recommended for the initial seasoning. These heat sources concentrate heat in the centre of the pan, which can cause uneven expansion of the steel and lead to the base warping or bowing outward. Once the pan is seasoned and you’re using it for regular cooking, induction and ceramic are generally fine — but for the seasoning process itself, stick to gas if possible.
The Science Behind Seasoning — Why It Works
This section is optional reading, but if you want to understand why the process works the way it does, here’s a straightforward explanation.
What’s actually forming on the surface
After multiple rounds of seasoning and regular cooking, the surface of a blue steel pan gradually turns black. That black layer isn’t dirt or residue — it’s a stable, protective surface made up of two components:
- Iron oxide (Fe₃O₄) — the dense oxide layer that forms through heat treatment and continued use. This is the same layer that makes blue steel more rust-resistant than standard carbon steel. It acts as a barrier between food and the raw iron underneath, reducing direct contact with the metal.
- Carbonized oil layer — every time you cook with oil at high heat, the oil breaks down and polymerizes, forming carbon particles and polymers that fill the microscopic pores on the steel surface. Over time, this builds into a smooth, hydrophobic (water-repelling) film — which is what gives the pan its nonstick properties.
Together, these two layers create a surface that food doesn’t bond to. This is physical nonstick — built up through use, not applied as a chemical coating.
Why high smoke point oil matters
The key to successful seasoning is polymerization — the process by which oil molecules bond together under heat and form a stable film on the steel surface. This only happens when the oil reaches a high enough temperature.
High smoke point oils — grapeseed, canola, sunflower — can withstand higher temperatures before they start to break down. This gives them enough time at the right temperature to polymerize properly and form a stable, even layer.
Low smoke point oils like olive oil or butter start to smoke and decompose before polymerization is complete. Instead of forming a smooth film, they leave behind a sticky, uneven residue — which is one of the most common reasons seasoning goes wrong. This is why olive oil and butter aren’t suitable for seasoning, regardless of how good they are for everyday cooking.
What to Cook First — Every Cook Is Also a Seasoning Session
After three rounds of seasoning, the pan is ready to use — but the seasoning process doesn’t stop there. Every time you cook with oil, you’re adding to it.
For the first few weeks, choose foods with a higher fat content — seared meat, chicken thighs, pork, sautéed vegetables cooked with a good amount of oil. These are forgiving to cook and actively contribute to building up the seasoning layer. Think of every cook as another round of carbon steel pan first use conditioning.
Save eggs and delicate fish for later, once the seasoning has had time to develop. These low-fat proteins are more likely to stick on a pan that’s still in its early stages.
The more you cook with it, the better it gets. A blue steel pan that gets used regularly every week will outperform one that sits in the cupboard for months — because every session adds another layer to the surface.
What to Do If Seasoning Goes Wrong
Sometimes the seasoning doesn’t go as planned — the surface comes out sticky, patchy, or uneven. This is usually down to too much oil or uneven heat. It’s not a reason to give up on the pan.
If the surface is sticky or blotchy: If the seasoning feels sticky or looks uneven, the most common cause is too much oil.Allow the pan to cool, then rinse it with warm water and gently scrub the affected area with a soft brush or non-aggressive scouring pad. Coarse salt can also be used to remove stubborn residue.Do not soak the pan for a long time. After cleaning, dry it immediately over low heat, apply a very thin layer of oil, and season it again.
If the pan has developed rust: For light surface rust, scrub the affected area with a scouring pad and warm water.If the rust is more difficult to remove, apply a diluted vinegar solution briefly to the affected area. Rinse thoroughly, dry the pan immediately over low heat, and reseason it.Avoid prolonged soaking, as moisture and acid can damage the seasoning and cause further rust.
Knowing how to reseason a carbon steel pan — and how to season a blue steel pan from scratch — is just as important as the initial process, because even well-maintained pans occasionally need a reset.
What Brand Owners and Importers Should Include in the Care Instructions
Explain whether the factory protective oil or wax must be removed before first use.
Provide separate instructions for gas, electric and induction stovetops.
Warn users not to soak the pan or place it in a dishwasher.
Explain that colour changes and patchy seasoning are normal.
Include simple instructions for rust removal and reseasoning.
Match the instructions to the actual surface treatment of the supplied pan.
Final Thoughts
Knowing how to season a blue steel pan is just the starting point — it’s a process, not a one-time event. Three rounds gets you started, but the pan continues to improve with every cook. The industrial oxide layer gives it a head start over standard carbon steel, but it still needs regular use and basic care to reach its full potential.
Cook with it often, use enough oil in the early stages, and choose the right stovetop for the initial seasoning. The rest takes care of itself over time.
Part of our blue steel pan guide: